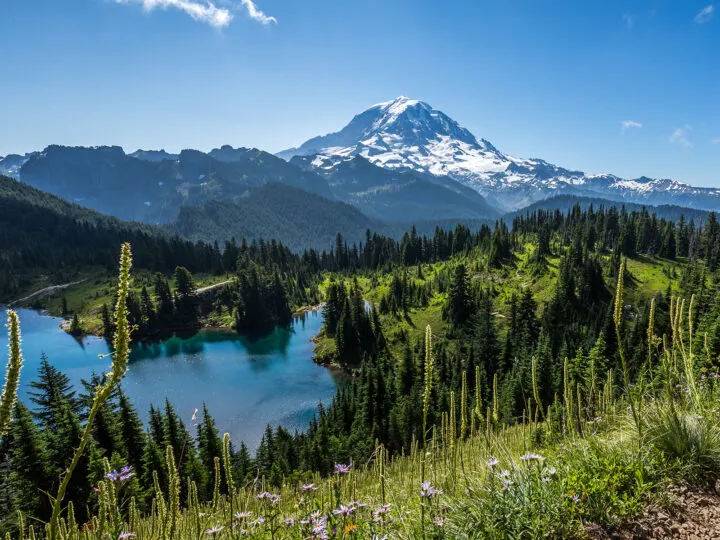
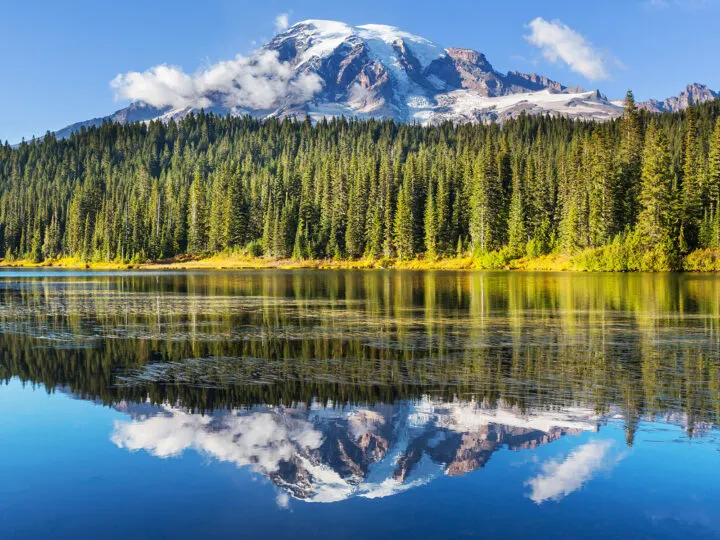
She’s beautiful, isn’t she? The largest peak in the Pacific Northwest, Mount Rainier is a gorgeous mountain! See her up and close with these best hikes in Mt Rainier National Park.
This post may contain affiliate links. For more info, see my disclosures.
Mount Rainier, also known as Tahoma or Tacoma in native language, boasts a large variety of trails worth exploring. Abundant with wildflowers in the summer and snowshoeing in the winter, there’s a perfect trail just waiting for you to discover at Mount Rainier.
Whether you’re visiting Mt Rainier for a day or staying a week to hike these epic Pacific Northwest trails, you’ll fall in love with this park. From alpine lakes to beautifully flowing waterfalls, gorgeous meadows and the rugged cliffs of the Cascades, this park has so much to offer! Hiking is truly one of the best things to do in Mt Rainier!
These trails will surprise you in the best way possible.
Must-watch video: hikes in Mt Rainier National Park
Planning your Mt Rainier hikes
In order to figure out where you want to hike, you’ll need to determine what area(s) you’ll be exploring. Mount Rainier National Park is huge!
With 260 miles of hiking trails, there’s a lot to consider when choosing how to spend your time in the park.
Here’s a map of the park. The purple icons are the entrance and/or visitor centers in each area. The blue line is the drivable area around the park.
Note: each of the hikes on this list includes which area of the park it’s in, for better planning purposes.
There are 5 regions of Mt Rainier
- Paradise: it’s the most popular and located in the southern area, nearest to the mountain. Hiking trails are phenomenal, but the crowds can be pretty intense, especially if you go on a weekend. Be prepared to start your day early.
- Longmire: on the southwest region, it’s one of the more quiet areas of the park with just a few trails. Get ready for lots of trees and some beautiful views.
- Ohanapecosh: located on the southeast part of the park, this area has some of the oldest trees, coolest lakes and best camping in the park.
- Sunrise: located in the northeast area and a personal favorite, this area has so much to offer. And stunning views of Mt Rainier!
- Carbon River/Mowich Lake: on the northwest corner and the least accessible part of the park. You’ll experience fewer crowds but amazing views.

Mt Rainier hikes map
Here’s a map of the best hikes in Mt Rainier. The coral colored icons are the trails, and you can see them layered over the roadways to see how to best get there.
Zoom in and scroll to see a specific area. And of course, check out the descriptions below.
As you read through the info below, take note of the areas your favorite hiking trails are in. Setting up your Mt Rainier itinerary should be well thought out to maximize your time in the park. 🙂
What to pack for Mount Rainier hikes
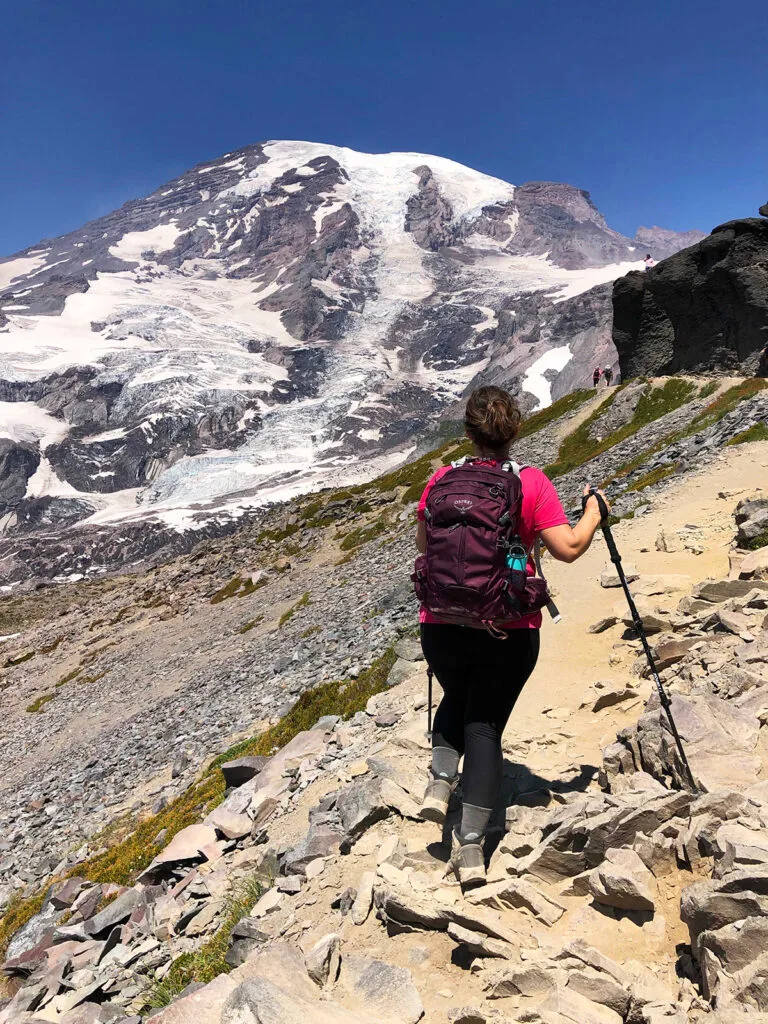
Before you start packing for your epic adventure through Mt Rainier, let’s go over some of the must-haves for hiking.
The time of year will change what gear you’ll need. Be sure to pack the 10 essentials for every hike.
Let’s go over the specific items you’ll want when hiking Mt Rainier…
- Hiking backpack. Whether you’re on an intense hike or one of the lighter trails, carrying around snacks, water and extra layers is necessary. Hiking backpacks that fit properly have a magical way of distributing the weight on your body, making them feel light as you hike. This is my favorite hiking backpack for day hikes, and works perfectly for hiking Mt Rainier.
- Hiking shoes. Unless you’re spending the day in the car and planning to check out just one or two short, easy hikes, I’d highly recommend good hiking shoes with traction. These are my favorite hiking shoes I’ve worn in the Pacific Northwest, but also other spots like the Kalalau Trail in Hawaii, Arches National Park in Utah and Jasper National Park in Alberta.
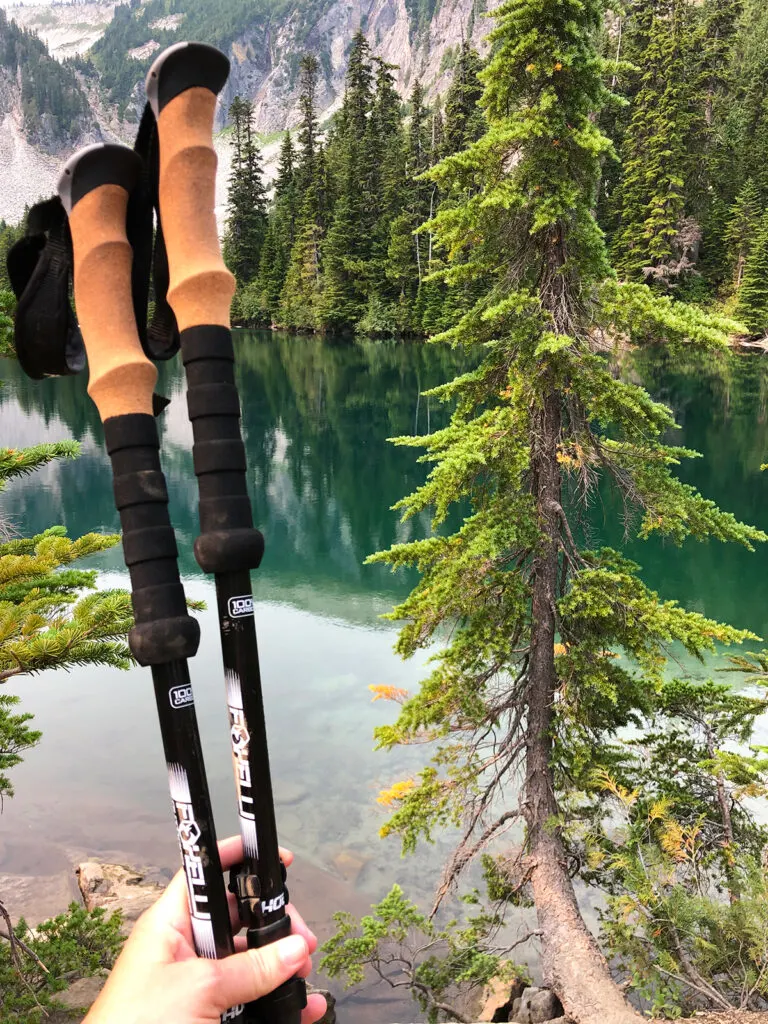
- Hiking poles. Easy to pack and super helpful on the trail, a good set of trekking poles will be your best friend during the steep inclines at Mt Rainier NP. These are the hiking poles I’ve used on almost all my hiking adventures, and I’d highly recommend them!
- Layers, layers, layers. The weather can turn in an instant in the park. Even during the summertime it can be really cool – or you could be sweating in the sun! Pack for the ‘just in case’ as it can be very unpredictable.
- Hiking socks. On one of my very first solo hiking adventures, I learned the importance of good hiking socks. These are my favorite brand of hiking socks, and you can get them for different boots and seasons.
- Satellite communicator. This allows you to call for help when there’s no cell phone service. I can’t tell you how many people I’ve seen injured on trails over the years – and this 2-way satellite communicator comes with me on every hike (and road trip) just in case!
- Bear spray. Black bears are common in Mt Rainier NP. An although you don’t want an encounter to turn dangerous, it is possible. If you’re driving to the park, grab this bear spray. If you’re flying in, you’ll need to pick some up at a store before heading to the park.
- Enough food and water. There’s limited services in the park, and you don’t want to get stuck without the proper nutrients and hydration to keep you going. Pack more than you need – just in case.
Hiking tips for this national park

Just a few more things to cover before diving into the list of the best hikes in Mt Rainier…
- 📍The land you’re hiking was original to 6 Native American tribes: Nisqually, Puyallup, Yakama, Coast Salish, Muckleshoot, Cowlitz and Squaxin Island. It’s original names are Tahoma or Tacoma, so that language is interspersed throughout this article. Be respectful and celebrate it’s origins before being renamed Mount Rainier.
- Leave no trace. Anything you take into the park, expect to take out – even compostable food scraps. Leave everything just as you found it. That means don’t stack rocks or use sticks as hiking poles. Just leave it be!😊
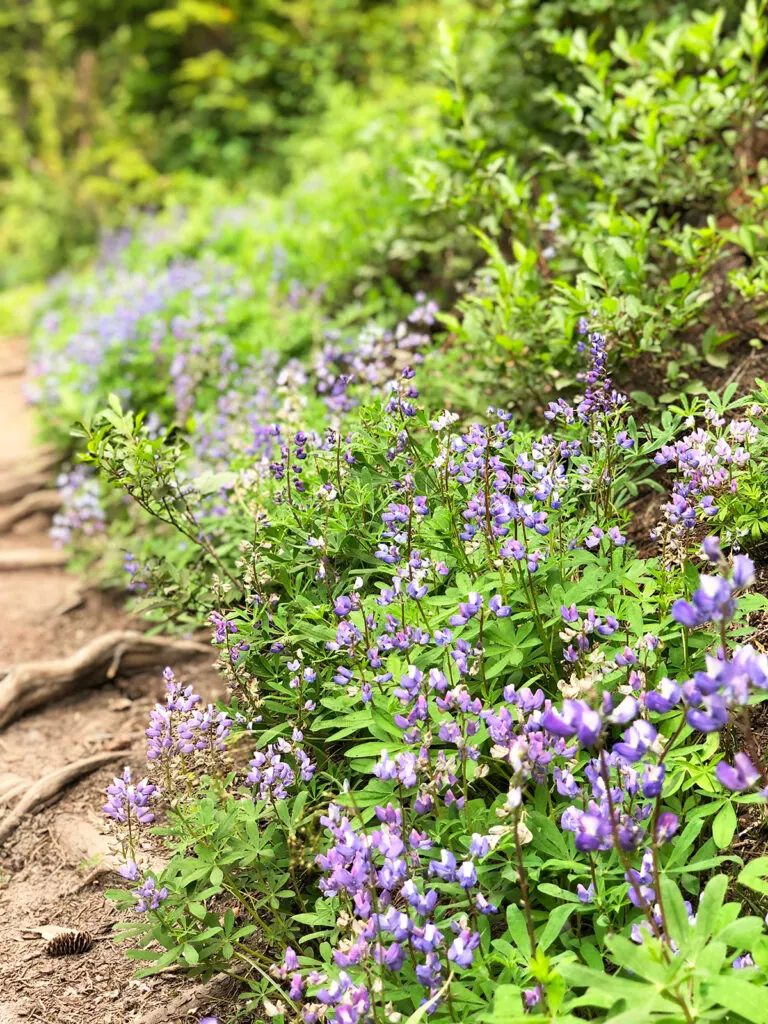
- Stay on the trail. This is a fragile environment. Trampling on the wildflowers and root systems kills the flora and fauna over time. Let’s keep it beautiful by staying on the trail.
- Dogs are not allowed on the hiking trails. Unless you have a service dog, of course. You can bring your pup anywhere cars can go. Be sure to pick up after them as needed.
- Fees for a single vehicle are $30. That’s pretty standard for the National Park Service. If you plan on visiting more than 2 national parks or protected lands within 12 months, definitely get an America the Beautiful Pass (by the way this makes a great camping gift ideas).
Best places to stay while visiting Mount Rainier
Whether you’re spending just a day in Mt Rainier or have a week to explore as many hiking trails as you desire, there are quite a few accommodation options nearby.
Because the park is so large, one of the best ways to experience it is by camping in the park. Get an RV rental if you don’t own one, and you’ll have convenient access to hiking trails.
Campgrounds at Mount Rainier National Park
- Cougar Rock (southwest)
- Ohanapecosh (southeast)
- White River (northeast)
- Mowich Lake (northwest) – tent camping only
Here’s a detailed guide to camping in Mt Rainier, which you’ll need to make camping reservations.
Pro tip: just be sure to plan really early! I’ve learned with owning an RV that booking up to 12 months out is expected! The closer you get, the less chance you’ll find a good (or any) RV-friendly camping spots.
Accommodations near Mt Rainier
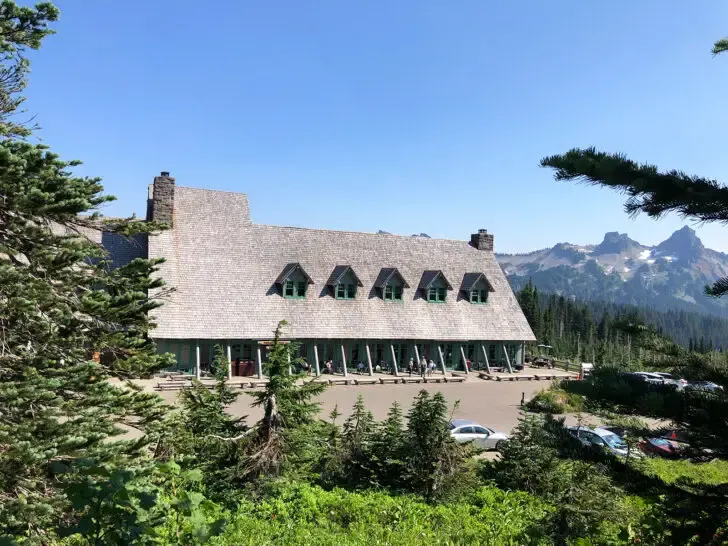
The prime location for a visit to the park is to stay at the Paradise Inn. Located in the heart of the park, this is in the middle of the action! It’s also very challenging to get a reservation!
It’s a bit more driving, but most visitors stay outside of the park. If you want to stay close to the west side of the park near the Nisqually Entrance/Longmire area, the cute mountain towns of Ashford to the west, or Packwood on southern side of the park are great options.
If entering from the Stevens Canyon (east) entrance, you can also find a cute vacation rental or local hotel in Packwood to the south or Greenwater to the north (closest to the Sunrise region).
Geesh – are you ready to get to this epic hiking list or what?! Let’s do it!
Best hikes in Mt Rainier
There’s a trail for everyone and every skill level at Mt Rainier. Let’s start off with some great hikes you’ll want to check out.
Throughout this list you’ll also see easy hikes in Mt Rainier, waterfall hikes and even a few for the hiking pros. Here we go…
1. Alta Vista Trail
Distance: 1.8 miles
Elevation gain: 616 feet
Hike time: 1 – 1.5 hours
Difficulty rating: moderate
Hiking area: Paradise
Trailhead location: Jackson Visitor Center
Located in the Paradise area just south of Mt Rainier herself, you know this is going to be good!
The trailhead shares the same as the popular Skyline Trail (see #4 below), but this trail is much shorter and instead of a loop, it’s an up-and-back trail. The path starts off pretty steep as you climb closer to the mountain.
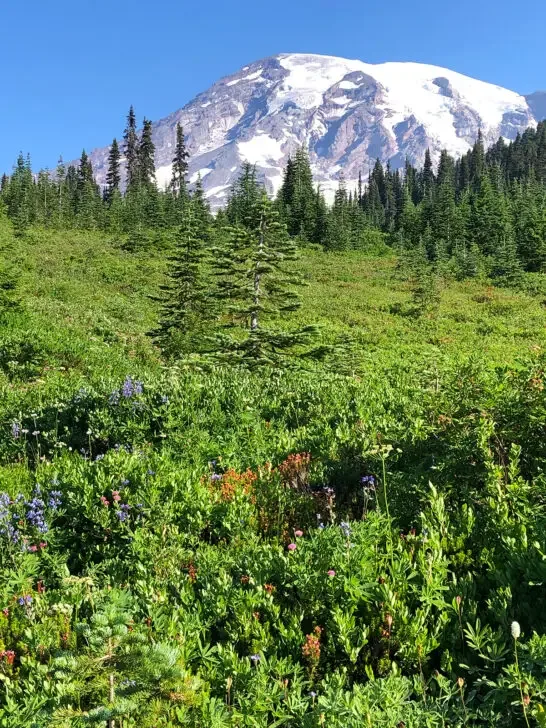
Alta Vista Trail features stunning views of Mt Rainier, fields of wildflowers in summer and bright red foliage in the fall.
It’s one of the best family-friendly trails in the Paradise Mt Rainier. Even though it’s a bit steep, it’s the right length for families while offering some of the most panoramic views in the park. Just stop for breaks for little legs as needed. 😊
You really can’t beat these views of Mt Rainier from the Alta Vista Trail!
Pro tip: the Alta Vista Trail is interconnected with a few other trails like the Nisqually Vista, Myrtle Falls and Skyline Trail. My favorite part of this was getting to the end and going a bit further – about 0.3 miles to Deadhorse Creek Trail.
2. Bench and Snow Lake Trail (a favorite on this list of best hikes in Mt Rainier)
Distance: 2.5 miles
Elevation gain: 700 feet
Hike time: 1 – 2 hours
Difficulty rating: moderate
Hiking area: Paradise
Trailhead location: 1.5 miles east of Reflection Lakes along Stevens Canyon Road
Ready for some alpine lake views? Thought so!
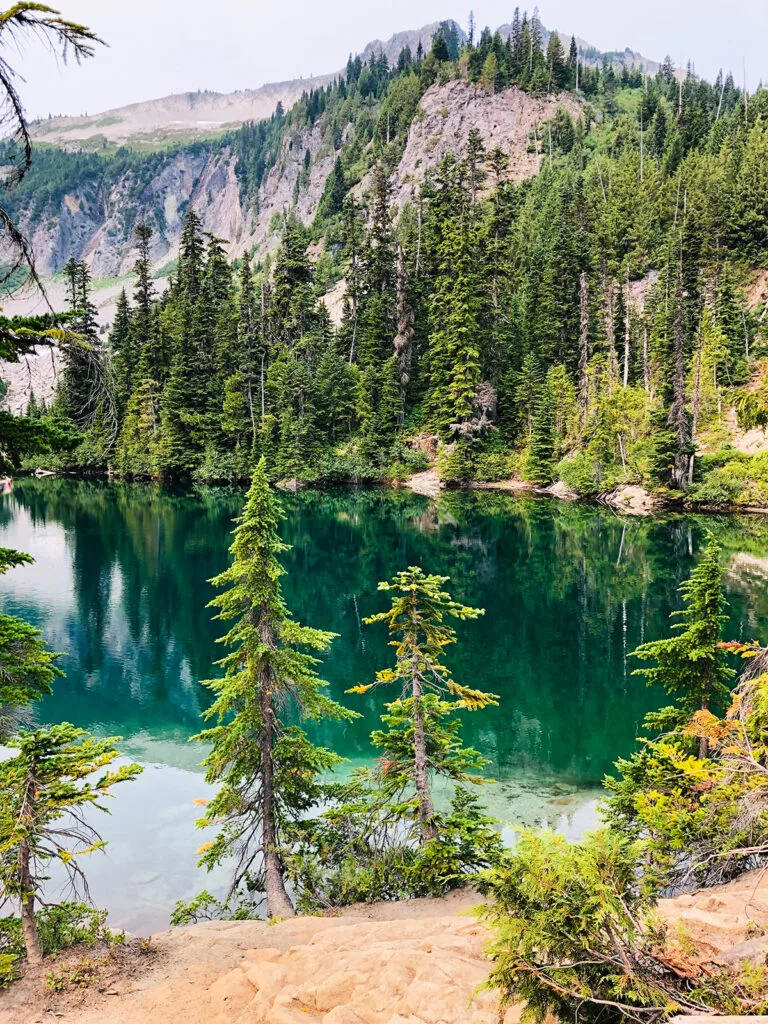
Bench and Snow Lake Trail in Mt Rainier is a really fun hike with some cool views. The trail takes you up and down over and over, like a roller coaster ride as you hike.
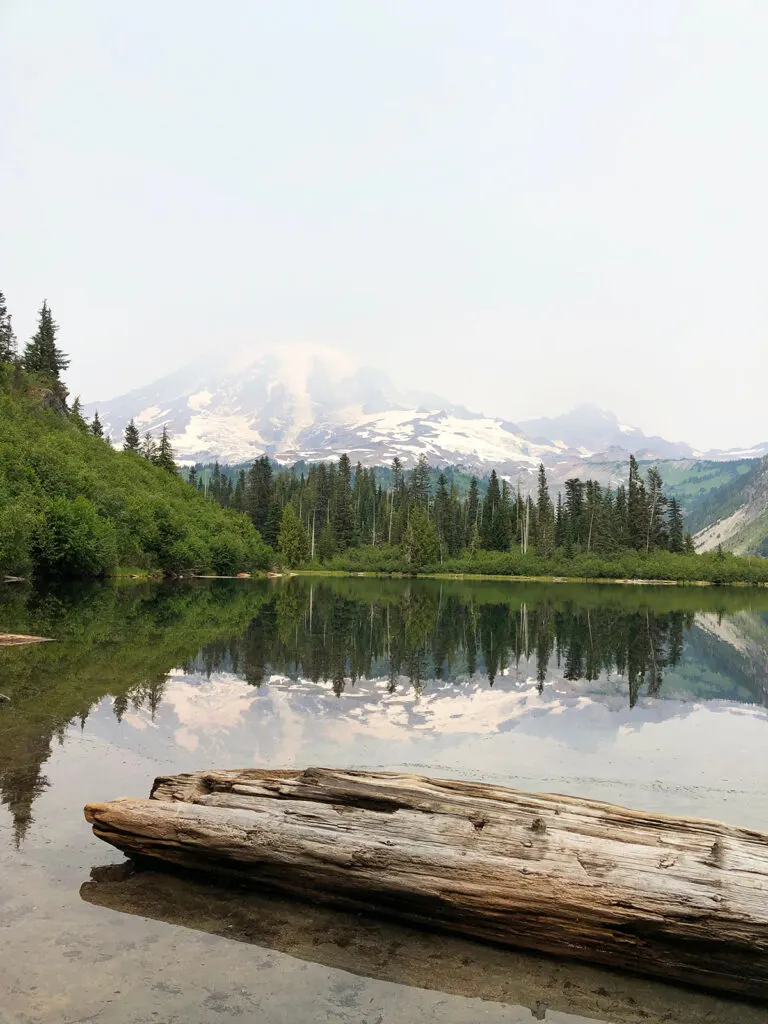
Since the trail is out-and-back, you’ll first arrive at Bench Lake, which is the smaller of the two lakes. When you see a sign to veer left to see the lake, take the left! The path can be overgrown but it’s worth it to walk all the way down to the lake shore. You’ll get gorgeous views of Mt Rainier from the lake.
The trail is fun because it takes you past meadows and is also wooded for a good portion of it.
Once you arrive at Snow Lake, you can stop for a picnic and just relax as you watch the vivid teal water. Snow Lake is serene and just what you need in this gorgeous national park.
Expect to see wildlife along the Bench and Snow Lake Trail. Marmots, black bears, elk and deer are common. It’s truly one of the best Mount Rainier hikes. 😍 As always, pack your bear spray and be prepared.
Pro tip: you can camp at Snow Lake Camp, but there’s only a few spots so grab your camping permits and get there early if you want a spot.
3. Golden Gate Trail
Distance: 3.8 miles
Elevation gain: 1,112 feet
Hike time: 2- 3 hours
Difficulty rating: moderate
Hiking area: Paradise
Trailhead location: Jackson Visitor Center
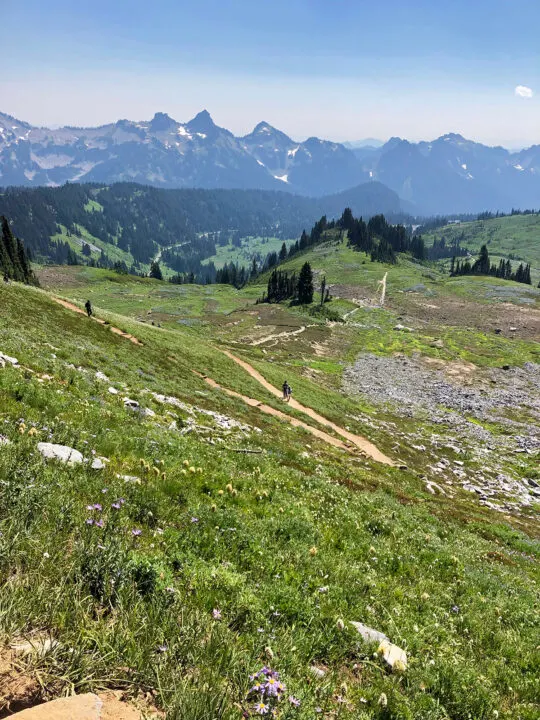
If you’re looking for Skyline Trail views without as much incline and distance, this trail is for you! One of my personal favorites in the park and one of the top things to do in the Pacific Northwest. The Golden Gate Trail has sweeping views of the Cascades, with Mt Rainier herself stealing the show.
The trailhead is the same as Skyline Trail, Alta Vista Trail and a few others. You’ll start at the Jackson Visitor Center and take the trailhead up to the right, past Myrtle Falls. From there, the trail zig zags upward toward Mt Rainier.
This trail features beautiful meadows that are filled with wildflowers during the summer and brilliant red foliage in the fall. The water that follows the trail up is quite exciting to see over and over, and sounds like a perfectly placed babbling brook.
The trail gets pretty steep at times, but is worth every step for these views of Tahoma and the nearby mountains!
Once the path meets back up with Skyline Trail, you can circle back to the right to return to the trailhead. On the way down, you’ll get views of the Cascade range, which is just stunning! This is truly one of the best hikes Mt Rainier.😍
Pro tip: this parking lot shares the trail with several others. Get there early, especially on the weekends if you want to snag a spot!
Best Mt Rainier Day Hikes
If you’re looking for an awesome day hike, I’ve got 4 trails here that are perfect for just that! Whether you like to take your time, take lots of photos or enjoy a good picnic lunch while hiking, these are the best day hikes Mt Rainier.
4. Skyline Loop Trail (most popular on this list of best hikes in Mt Rainier)
Distance: 5.5 miles
Elevation gain: 1,788 feet
Hike time: 4.5 – 6 hours
Difficulty rating: difficult
Hiking area: Paradise
Trailhead location: Jackson Visitor Center
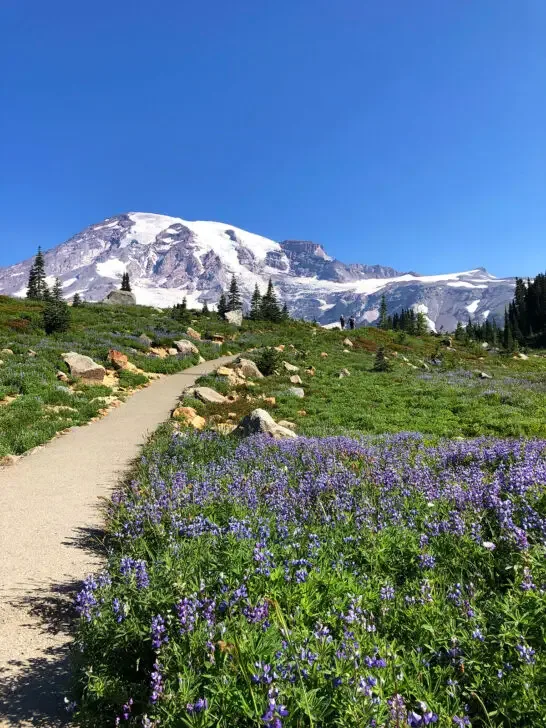
One of the best, and most popular hikes in Mt Rainier is the Skyline Trail Mt Rainier. It’s a fairly difficult trail with quite a bit of elevation gain, but it takes you really close to Mt Rainier herself.
Panorama Point is a well-known feature on the trail, which provides 360 degree views of Mt Rainier and the Cascade Range. On a clear day, you can see all the way to Mount Hood and Mt Saint Helens.
In the summer you’ll be met with beautiful meadows of flowers and in the fall they turn to beautiful red foliage.
The trail is open in the winter (weather permitted) for snowshoeing but proper gear is required, including snow spikes or crampons. Trekking poles and good hiking boots are helpful year round for the Skyline Loop Trail.
The trail is a loop, and the best views of Mt Rainier is by hiking it in a clockwise direction. The incline is steeper this way, but it’s worth it. If you hike counter clockwise, the mountain hides behind a large hill and you won’t get as many views while hiking.
The Jackson Visitor Center has restrooms and amenities before and after you hike. At Panorama Point you can find one pit toilet.
Pro tip: during weekends and holidays, this trail gets super busy. Hit the trail head early – by 8am so the parking lot doesn’t fill up!
5. Tolmie Peak Lookout Trail (one of the absolute best hikes Mt Rainier)

Distance: 5.6 miles
Elevation gain: 1,541 feet
Hike time: 3 – 4 hours
Difficulty rating: moderate
Hiking area: Carbon River/Mowich Lake
Trailhead location: nearly 17 miles into the Mowich Lake Road
This is one of those hikes. You know, the ones that you’ll want to do over and over again. It’s on the challenging side of moderate, but the views will reward you in the best way possible.
The Tolmie Peak Fire Lookout Tower is a historical landmark, so the tower itself is closed but you can walk the exterior of it and peek inside.
With inspiring views of Mt Rainier, Mt Saint Helens and the Cascades, this trail will capture your heart. Hiking the Tolmie Peak Trail, you’ll pass not one but two beautiful lakes.
Mowich Lake boasts a gorgeous blue shade you’ll love. And Eunice Lake is the most amazingly crystal clear water. They’re both the picturesque Pacific Northwest views you’ve been waiting for.
The last mile of the hike the incline and switchbacks are pretty intense, but it’s worth it in the end! Hiking poles are helpful for this hike. The lookout is pretty windy, so be prepared with extra layers based on the season you hike.
Mt Rainier is absolutely breathtaking from the lookout! It’s a great spot to sit and rest a bit after a big climb. Grab a snack or your packed lunch and enjoy the view while reenergizing your muscles!
You can choose to continue past the lookout to the end of Tolmie Peak, about 0.5 miles more for even better views.
Pro tip: the road to the trailhead is gravel and for 16 miles, you’ll have to traverse the muddy or snowy terrain. Be prepared with a high clearance vehicle and/or 4×4.
6. Mount Fremont Lookout Trail
Distance: 5.7 miles
Elevation gain: 1,118 feet
Hike time: 2.5 – 3 hours
Difficulty rating: moderate
Hiking area: Sunrise
Trailhead location: Sunrise Visitor Center
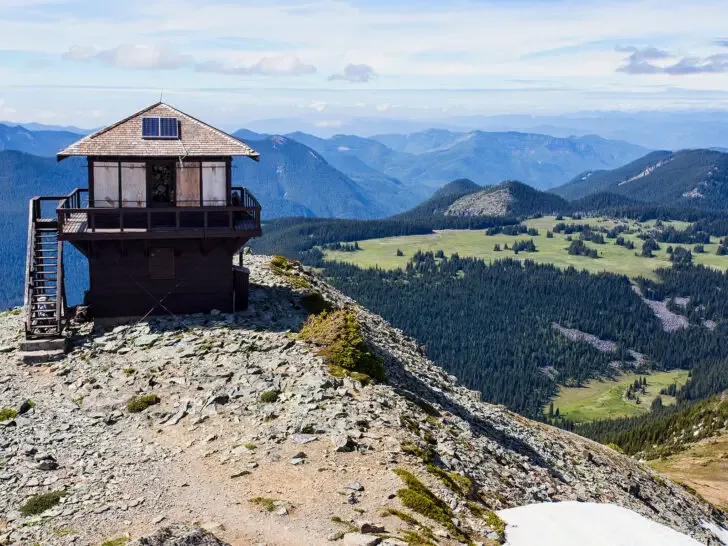
Well if it hasn’t been said enough yet on this list of the best hikes Mount Rainier, the views from this trail are incredible! This doubles as one of the best Mt Rainier day hikes, too.
The Mount Fremont Lookout Trail is well maintained and pretty easy to navigate. Starting at the trailhead, you’ll climb climb climb out of the Sunrise parking lot but the trail levels off after that. There is a variety of views the entire trail, which is always really fun!
It’s one of the more popular Mount Rainier hiking trails in the Sunrise area of the park, so be prepared by getting there early, especially if you’re hiking on a weekend.
The trail is kid-friendly for the most part, especially for older kids and teens. There’s a rocky area which is unsteady, but if you’re going slow enough it’s still doable with children.
If you’re hiking in the summer, be sure to wear sunblock and drink plenty of water as the trail is completely exposed.
Be prepared with extra layers at the lookout, it gets very windy and can be really cold being completely exposed!
7. Palisades Lakes Trail (underrated trail and one of the best hikes in Mt Rainier)
Distance: 7.2 miles
Elevation gain: 1,633 feet
Hike time: 5 – 6 hours
Difficulty rating: moderate
Hiking area: Sunrise
Trailhead location: at the parking area at Sunrise Point, about 10 miles from the White River Entrance
If you’re looking to escape the crowds and get some great exercise while hiking, this is one of the best Mt Rainier hikes for you!
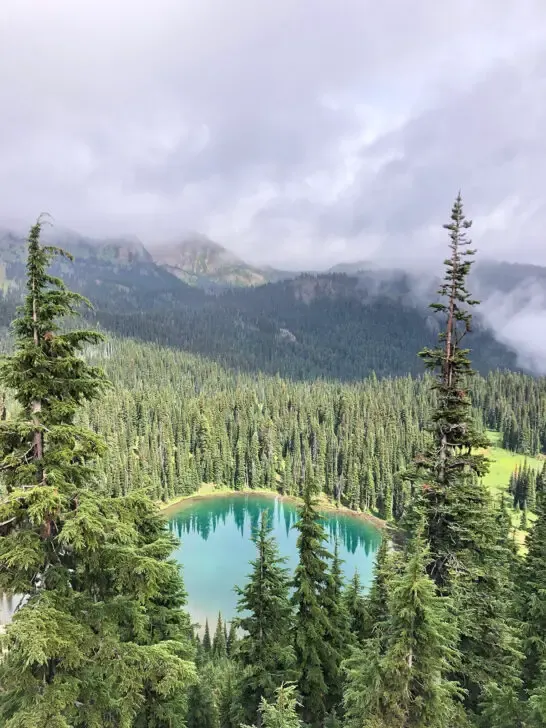
This winding, up-and-down trail is a hidden gem within the park, based on the amount of foot traffic it receives. This trail doesn’t offer any views of Tahoma, but has 5 fabulous lakes instead!
The hike starts with a long, gradual decline into the valley and has quite a bit of inclines and descents, making it more on the difficult side of a moderate trail.
Sunrise Lake, Clover Lake, Hidden Lake, Dick Lake and Upper Palisades Lake are the real stars here! With crystal clear water, the lakes are beautiful well worth the long hike.
Palisades Lakes Trail in Mt Rainier National Park is also prone to wildlife sightings. Elk, bear, marmots, salamanders and frogs, just to name a few. In the summer expect meadows of gorgeous wildflowers, as well as blueberries and huckleberries.
Mosquito repellent and bear spray are a must for this trail!
Pro tip: get an overnight permit to camp near Upper Palisades Lake. You’ll get more time to explore the area and see sunrise and sunset in this part of the park.
Mt Rainier easy hikes
Lightening things up a bit, these next trails are the easy hikes in Mt Rainier National Park. You can combine these with a day hike, several easy hikes or just stop at one of these trips while driving the scenic roads.
And obviously, these next few hikes are best in the list for young kids (although I’ve known some pretty tough hiker kids!)
8. Grove of the Patriarchs (one of the very best hikes Mt Rainier)
Distance: 1.1 mile
Elevation gain: 52 feet
Hike time: 30 minutes to 1 hour
Difficulty rating: easy
Hiking area: Ohanapecosh
Trailhead location: Near the Stevens Canyon Entrance on Hwy 123, past the Ohanapecosh River (watch for signs)
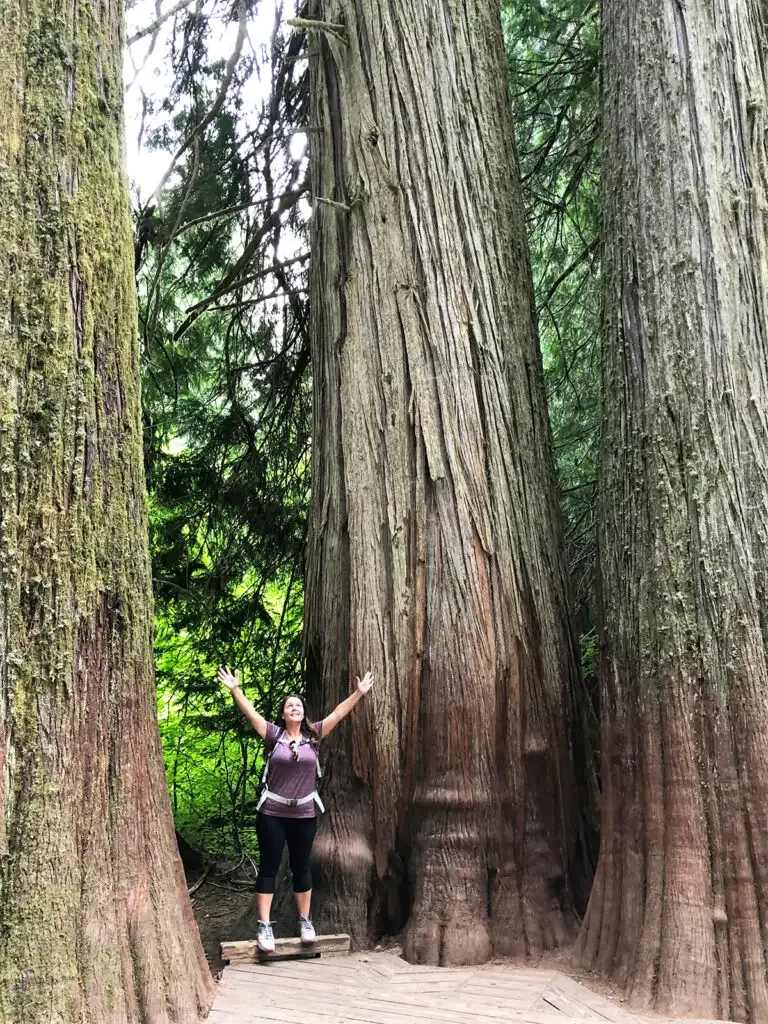
It’s one of the easiest hikes in Mt Rainier, and one of the most fun for kids and adults alike. Stepping into the Grove where you see massive trees over 1,000 years old is like walking into a magical place.
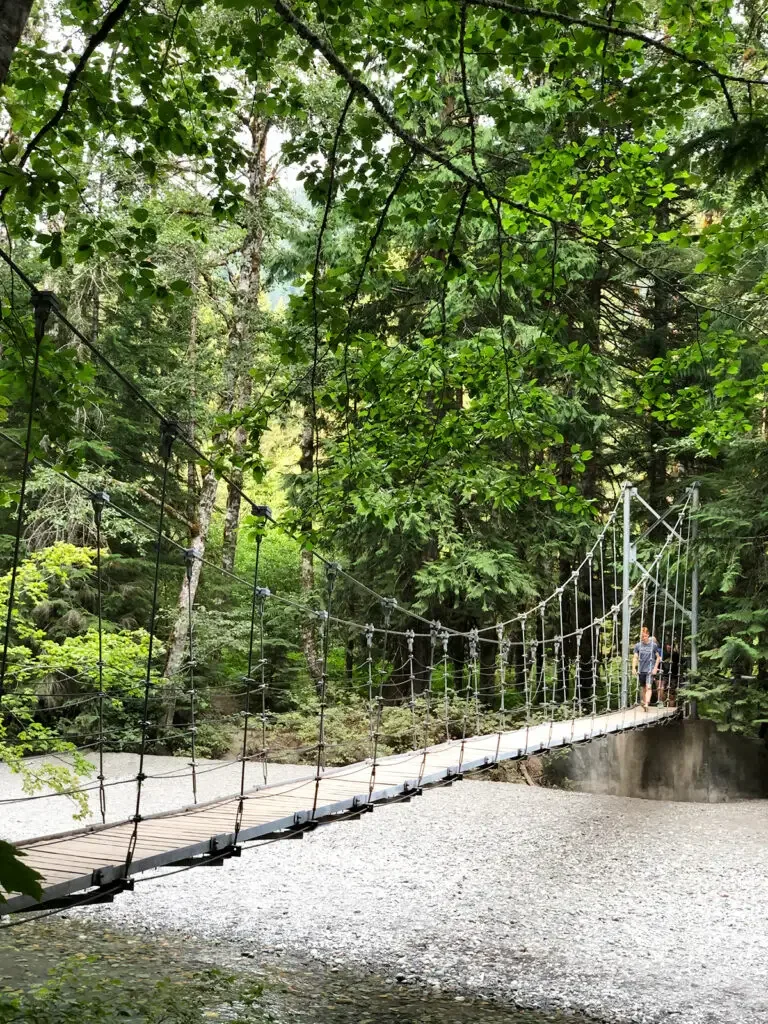
The short walk to get to the Grove of the Patriarchs is a dirt path in the woods. You’ll walk alongside a picturesque, flowing river of green water. The swinging bridge over the river is a fun activity in itself!
Past the bridge you’ll get to tour some of the oldest trees in Mt Rainier National Park. The highlight of the wooden trail is the Twin Douglas-firs. They’re massive in size and really cool to see!
Be respectful to stay on the path during this hike, as stepping off the path packs the dirt down, creating hardship for these massive trees.
Pro tip: this trail gets busy! Expect to get there early for parking, and circle back to it if the lot is full. The swinging bridge also often has a wait to cross due to the volume of people on the trail.
Editor note: as of the time of publication this trail is closed for maintenance. The swinging bridge suffered major damage. Here’s to hoping it reopens soon! Check here for trail updates.
9. Silver Forest Trail (another one of my favorite trails on this list of best hikes Mount Rainier)
Distance: 1.9 miles
Elevation gain: 200 feet
Hike time: 1 hour
Difficulty rating: easy
Hiking area: Sunrise
Trailhead location: at Sunrise Visitor Center
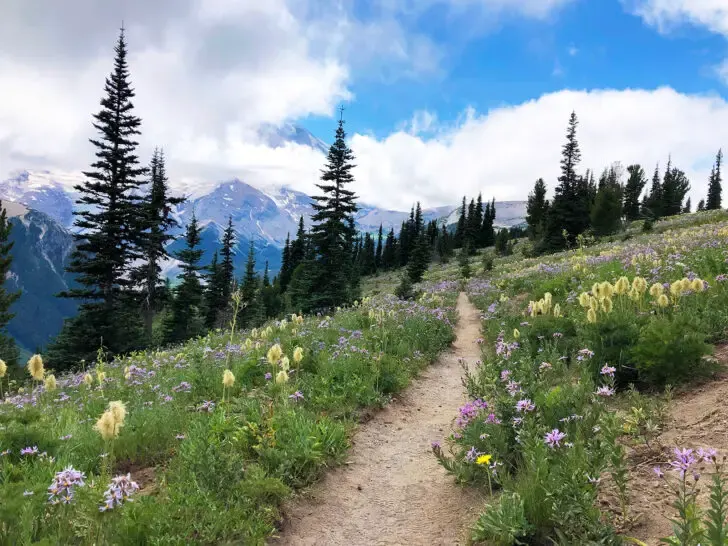
The Silver Forest Trail is one of the most underrated trails in all of Mt Rainier NP. The up-and-back trail provides amazing views of Mt Rainier.
From the parking lot at Sunrise Visitor Center, head south towards the Emmons Vista Overlooks. There are two spots perfect for seeing incredible views of the mountain. After you’ve taken your photos, continue on to Silver Forest Trail.
In the summer, it boasts gorgeous wildflowers and in the fall, beautiful foliage greets you along the path. In fact, this is the most wildflowers I’ve ever seen on a trail in Mt Rainier!
As you hike, you can see the river and valley below. The views are about the same the entire way up and back the trail, so if you’re short on time you can just go part of the way and return back to the trailhead or parking lot.
Silver Forest Trail is worth the easy hike for the beautiful foliage the park boasts!
Pro tip: Sunrise parking lot is large but it does fill up in the peak hiking season and on weekends. Get there early and plan accordingly. Luckily, once you’re parked, you can access many trails from the same parking lot, which is a bonus.
10. Sunrise Nature Trail
Distance: 1.5 miles
Elevation gain: 370 feet
Hike time: 1 hour or less
Difficulty rating: easy
Hiking area: Sunrise
Trailhead location: at Sunrise Visitor Center
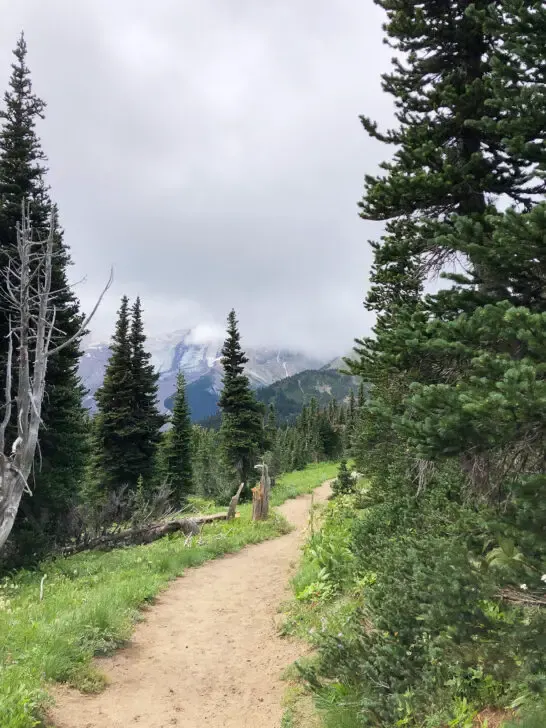
A short, fun hike with dynamic views, the Sunrise Nature Trail is a great trail for those wanting to take it a little easy. It’s a great trail after a long day of hiking, or if you’re on a restful day in the park with some light walking.
The trail begins at the Sunrise Visitor Center, and inclines about 0.5 miles until you reach the Sourdough Ridge. The views from the top (on a clear day) are beautiful! You’ll see Tacoma on one side and the Cascade Range from the other.
The Sunrise Visitor Center is the mecca for many trails, and if you choose to continue hiking, on the west end of the trail it meets up with Sourdough Ridge Trail to Frozen Lake. On the east end of the Sunrise Nature Trail, you can continue on to the Dege Peak.
If you’re an early riser, you can get to the Sunrise parking lot early, climb the trail and watch the sunrise from here. It’s spectacular!
11. Box Canyon
Distance: 0.3 miles
Elevation gain: pretty much 0
Hike time: less than 30 minutes
Difficulty rating: easy
Hiking area: Ohanapecosh
Trailhead location: along Stevens Canyon Road, about 1/2 way between Paradise and the Ohanapecosh campground
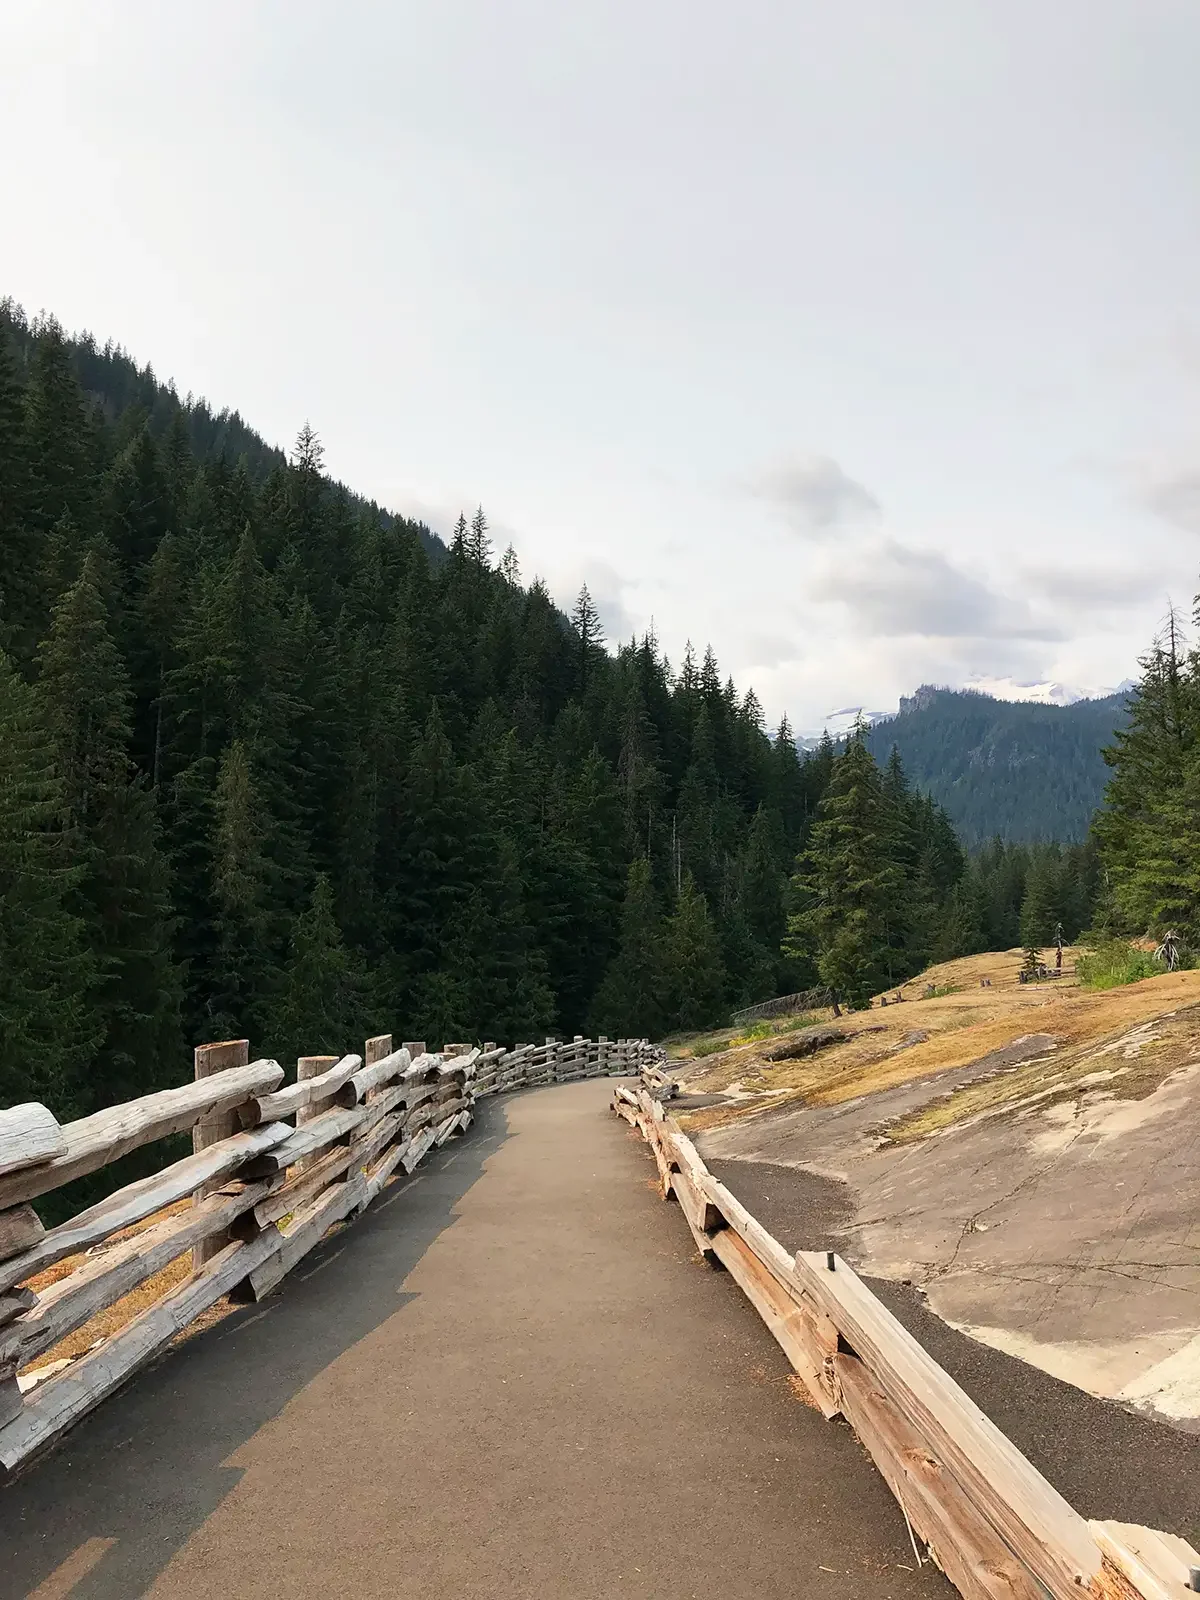
One of the easiest trails to walk in the entire park, this trail is fully accessible! 🙌 For wheelchair users, the first part is boardwalk until the bridge. The 2nd half is dirt path, so simply turn back and return from the boardwalk to the parking lot.
I know it’s an easy hike, but I’m also including this one because it’s just so cool to see. And it’s an easy trail to add in between other hikes throughout your time in Mt Rainier National Park.
The main parking lot and restrooms give way to a lower observation point. You can’t see the canyon or river there as well, which is why you’re going to hike the 0.3 mile loop to check it out.
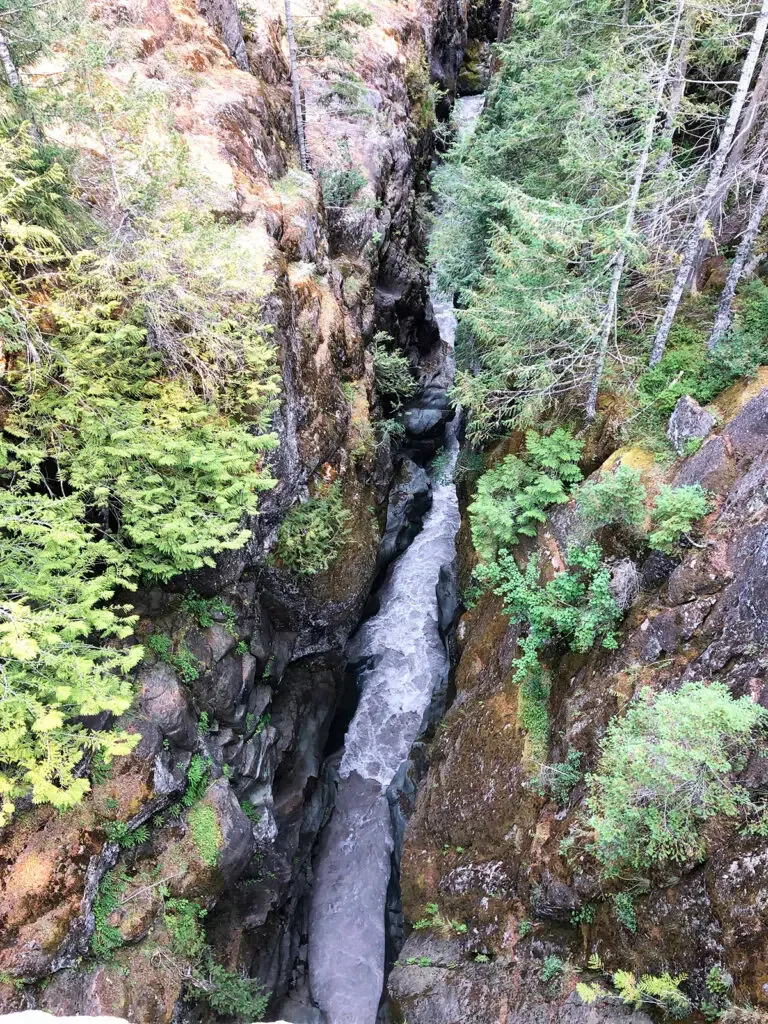
It’s difficult to see from photos how dramatic this canyon is.The river below is forcing water through the narrow walls at such a fast speed, it continues to dig the canyon deeper every day.
From the top of the canyon wall to the surface of the river is 115 feet, but only 13 feet wide at the widest point. Standing on the bridge, the roar from the river is loud and quite creepy looking down. Don’t drop anything!
There are signs throughout the area with history of this part of the park, which are interesting to read. The area was once a glacier, and it carved grooves in the rock as it slid and melted away. The Cowlitz Glacier is still in the park, only a mere 3 miles away as the size is significantly smaller these days.
As you walk the trail, you’ll see areas of multi-colored plants over rock. That’s hundreds (or thousands) of years of vegetation growing, and starting the forest anew. Pretty impressive!
12. Tipsoo Lake Trail (one of the Mt Rainier hikes everyone will love)
Distance: 0.8 miles
Elevation gain: 39 feet
Hike time: 30 minutes
Difficulty rating: easy
Hiking area: Ohanapecosh
Trailhead location: Tipsoo Lake parking lot
One of the easy hikes Mt Rainier National Park, the trail around Tipsoo Lake is a nice path for an easy day, or a great add-in after exploring other trails in the park.
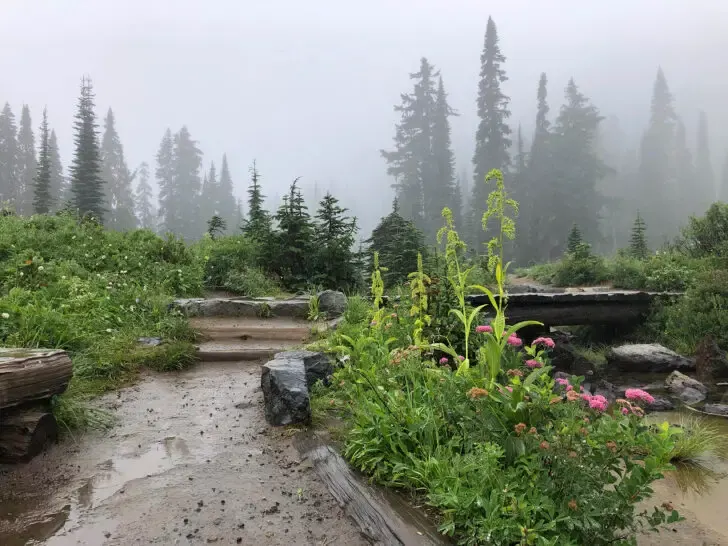
The path is almost completely paved, making it easy for all skill levels, including kids and elderly or others with mobility challenges.
The paved trail is around a pretty lake with beautiful wildflowers. Once you get about half way around the lake, you’ll see Mount Rainier on a clear day.
This trail is known to have lots of mosquitos, so be sure to lather up.
Pro tip: parking lot fills up early since it’s the starting point for a few trails. Go early or late to avoid the crowds.
13. Trail of the Shadows
Distance: 0.7 miles
Elevation gain: 39 feet
Hike time: less than 1 hour
Difficulty rating: easy
Hiking area: Longmire
Trailhead location: across the road from the National Park Inn
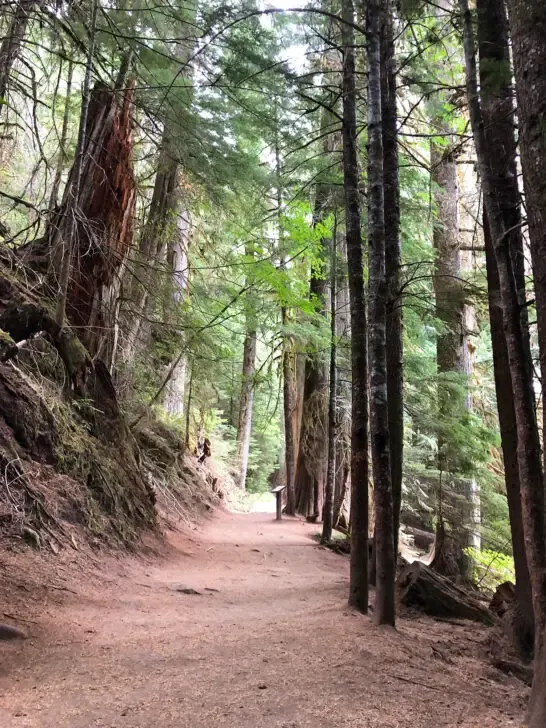
This is a fun, easy walk through the woods. This trail has a fun bonus – it’s full of info about the Longmire family, including an old cabin. It features hot springs, which are some of the highlights of the hike.
Ranked as one of the best hikes in Mount Rainier National Park for young kids,not only is this hike easy, it also has restrooms and picnic tables nearby – a bonus for sure.
The Trail of the Shadows is one of just a few interpretive trails within the park. With plenty of signs to read about the different nature of the area, as well as the history, this trail is for those who are interested in the park’s beginnings.
The nearby Longmire Museum has a small display area about the history of the park and how it was developed starting with the Longmire family. Let’s not forget the area designated of Mt Rainier National Park was home to the Nisqually, Puyallup, Yakama, Coast Salish, Muckleshoot, Cowlitz and Squaxin Island people.
Oh, and the meadow is beautiful and a great spot to take photos during your hike.
The Trail of the Shadows is one of the only trails in the park that can be accessed year-round (the museum may not be though). It’s really quite something to walk along the oversized trees within this trail!
Mt Rainer waterfall hikes
Gah! Who loves a good waterfall hike? Mount Rainier has beautiful waterfalls worthy of every step of the hike.
Some of the best hikes I’ve ever experienced are when you get to hike to waterfalls. It reminds me of Virginia Falls in Glacier National Park or the Monteverde Waterfall in Costa Rica.
14. Comet Falls
Distance: 3.8 miles
Elevation gain: 1,250 feet
Hike time: 2.5 – 3 hours
Difficulty rating: difficult
Hiking area: Longmire
Trailhead location: 10 miles east of Nisqually Entrance on the Longmire-to-Paradise Road, just before you reach Christine Falls
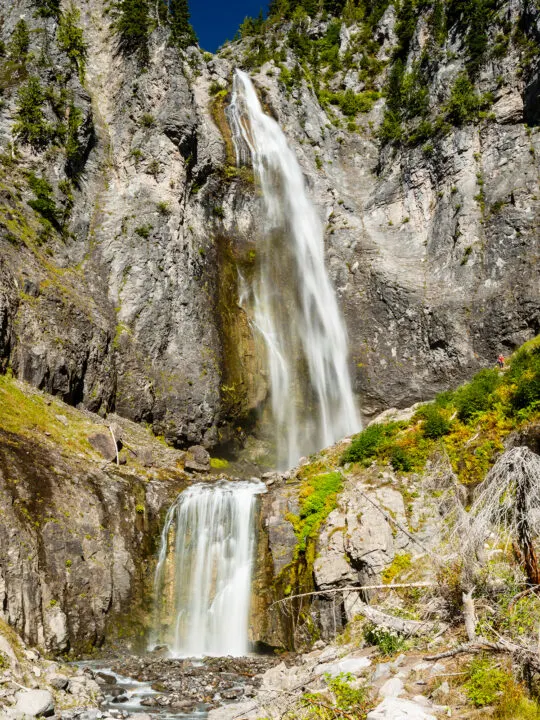
Looking for a good workout plus a beautiful set of waterfalls? Comet Falls Trail is for you! It’s one of the more strenuous trails on this list of the best hikes in Mt Rainier, and for good reason.
This Mount Rainier hiking trail has the perfect balance of shade and sun. The incline, however, is not balanced! It’s pretty steep and continuous almost the entire way to the falls.
If you’re a newbie hiker and feel the thigh burn, take plenty of breaks along the way. Even if you’re an experienced hiker, you might need breaks along the way too.😊
One of the most notable features on this hike – apart from Comet Falls is the Van Trump river. With its own set of smaller waterfalls, it’s a beautiful sight to see.
You actually cross the river towards the end of the trail, which is tricky. Be sure to have proper footwear, and if it’s snowy or slushy follow your gut if you should pass or not. Comet Falls is just on the other side of the river.
Once you arrive at Comet Falls, there’s plenty of area to sit and enjoy the falls. The 320-foot waterfall does not disappoint! Told ya it was one of the best Mt Rainier hikes! 💛 Bring a snack or pack a lunch and enjoy the view
Pro tip: another tiny parking lot. Arrive early on the weekends or try a weekday. Have an alternative hike in mind if you get there and it’s full.
15. Narada Falls (easy, short trail on this list of best hikes in Mt Rainier)
Distance: 0.4 miles
Elevation gain: 200 feet (on the return ascent)
Hike time: 10 minutes or less
Difficulty rating: easy
Hiking area: Paradise
Trailhead location: just west of the Paradise area of the park, along Paradise Valley Road from Longmire
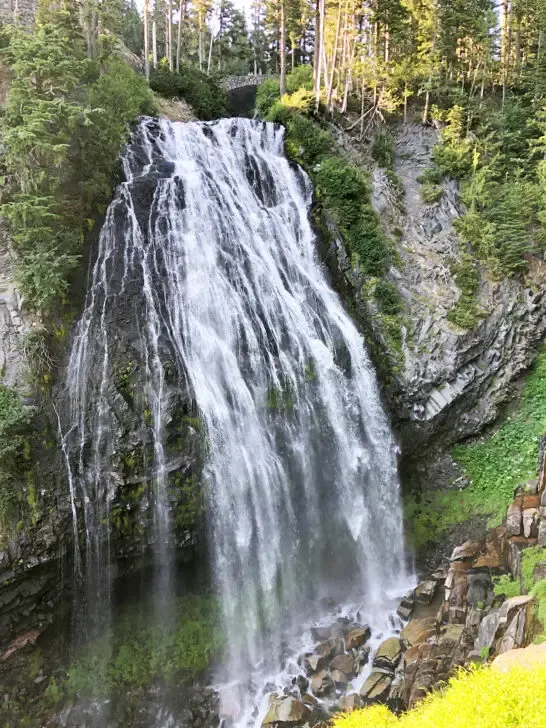
Barely even a hike, the trail to Narada Falls is short and sweet. There’s plenty of parking and restrooms nearby, making this a popular stop along Paradise Valley Road from Longmire to the Paradise area.
You can see Narada Falls from the parking area, but the best views are walking down the path to the base of the falls. It’s actually one of the more steep Mt Rainier hikes on the way down, but worth the views.
The 168-foot waterfall is one of the largest available to see by car in the national park – the others you’ll have to hike to!
On a sunny day, the mist at the base of the falls makes a perfect rainbow and it’s quite stunning!
This is one of the best hikes in Mount Rainier National Park for young kids or those looking for an easy trail. The hike back up to the parking lot is steep, but doable under most circumstances.
Note: the road to Narada Falls is open year-round. The trail to the lower observation point is very slick in winter so it’s advised just to see it from the top of the falls when snowy or slushy.
16. Silver Falls Loop
Distance: 3 miles
Elevation gain: 600 feet
Hike time: 1.5 – 2 hours
Difficulty rating: moderate
Hiking area: Ohanapecosh
Trailhead location: Ohanapecosh campground
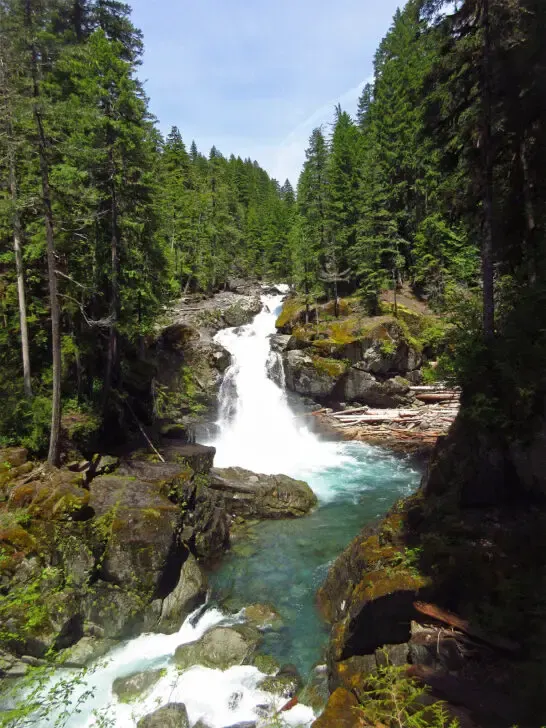
One of the pretties and most secluded waterfalls in the park,the hike to Silver Falls is one worthy of this list of the best hikes in Mt Rainier!
To see Silver Falls, you have two options. The first, shorter trail is starting at the Ohanapecosh parking lot. This will take you 3 miles round trip to the falls.
Alternatively, you can park at the Grove of the Patriarchs and enter the trail there, which adds some length for a total distance of 4 miles round trip.
It’s the kind of waterfall hike worthy of packing a lunch or snack and enjoying the water while replenishing some protein. Don’t expect to be the only one on the trail though! It gets busy because it’s such a great hike!
This trail is one of the more kid-friendly hikes in Mt Rainier, too. With an abundance of shade and solid hiking path, it’s easier to keep track of kids on this trail.
Pro tip: arrive at the trailhead early as parking is very limited. If parking is full, do another hike or explore the area and come back later in the day to this area.
17. Myrtle Falls via Skyline Trail (a popular trail on this Mount Rainier hikes list!)
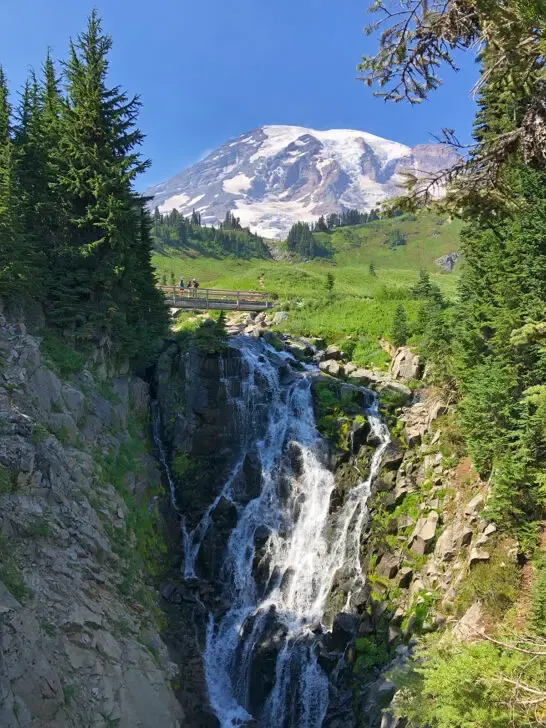
Distance: 0.8 miles
Elevation gain: 150 feet
Hike time: less than 30 minutes
Difficulty rating: easy
Hiking area: Paradise
Trailhead location: Jackson Visitor Center
One of the easiest hikes in Mt Rainier also takes you to one of the most beautiful waterfalls in the park!
The hike to Myrtle Falls is paved and really accessible, making it great for wheelchairs and strollers. The main viewpoint to the falls does require a few steep stairs and dirt overlook, so be aware of that prior to starting the trail if you’re concerned about accessibility.
Starting at the Skyline Loop Trail entrance near the Jackson Visitor Center, stay on the trail to the right and within 1/2 mile you’ll be at Myrtle Falls. You’ll get gorgeous views of the falls and Mount Tahoma from this trail.
This trail one of the best hikes Mt Rainier so it’s popular, it gets really busy, just be prepared for crowds. Come early to find a parking spot at Paradise, as this is the most popular area in the park.
Mt Rainier hikes – more great trails
Can you believe this list?! And there’s still more awesome trails to cover!
One of the best things about visiting Mount Rainier National Park is that there truly is something for everyone. With views for dayyyyys, let’s keep going on these hikes in Mount Rainier National Park.
18. Naches Peak Loop (another favorite on this list of best hikes in Mt Rainier)
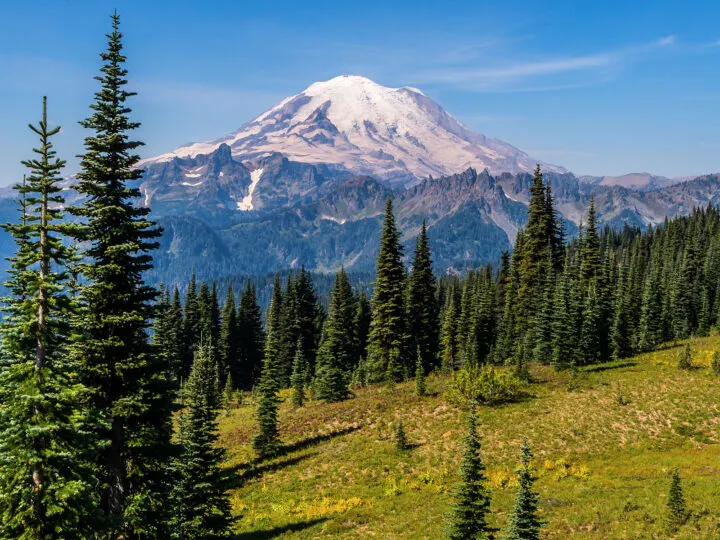
Distance: 3.3 miles
Elevation gain: 636 feet
Hike time: 1.5 – 2 hours
Difficulty rating: moderate
Hiking area: Ohanapecosh
Trailhead location: Tipsoo Lake
If you’re looking for a shorter hike with gradual inclines, this one is for you. The Naches Peak Loop Trail is a favorite on the eastern side of Mt Rainier.
Pro tip: complete the loop clockwise to get the best views of Mt Rainier. If you go counter clockwise, the view will be behind you.
The hike starts of paved as you make your way around Tipsoo Lake. Further in, you’ll pass alpine meadows, which are vivid in the fall when the foliage prepares for winter. The uphill trail starts to taper off when you hit a couple of switchbacks, when you can really get excited for the views.
When you get to the viewpoint overlooking the lake, you’ll know why this is one of the best hikes in Mount Rainier National Park – it’s stunning! These are some of the best views in the park, with the stunning Mt Rainier staring right back out at ya.
Naches Peak Loop Trail is family-friendly, although young kids might like to take a few breaks during the first half due to the continuous incline.
Take a picnic lunch at Tipsoo Lake or the rock bench at the viewpoint 1/2 way through the trail. You can’t go wrong either way. 😊
19. Pinnacle Peak Trail
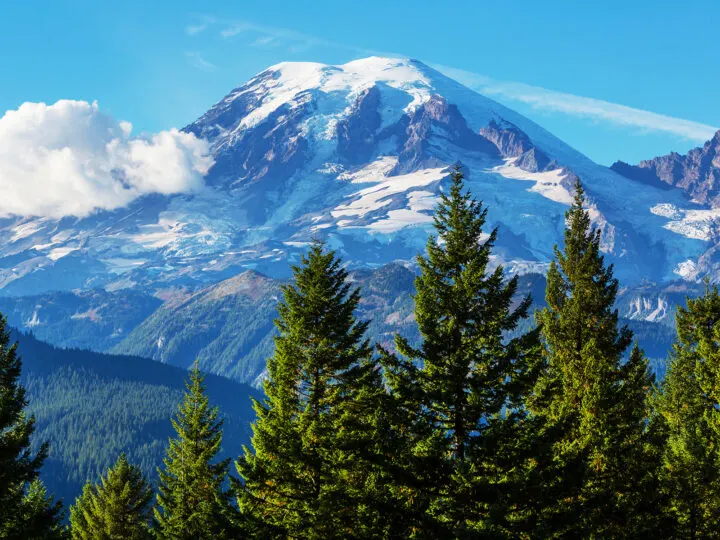
Distance: 2.8 miles
Elevation gain: 1,423 feet
Hike time: 2 – 3 hours
Difficulty rating: moderate
Hiking area: Paradise
Trailhead location: across the road from Reflection Lakes
If you’re looking for a moderate hike that provides a variety of scenery in one trail, Pinnacle Peak is for you.
The views of Mt Rainier are incredible from this trail! On a clear day, you’ll also get to see Mt. Adams, Reflections Lake, Louise Lake and Pinnacle Glacier, which is a bonus.
The trail starts off under tree cover in the beginning and the higher you get, the more exposed the trail becomes. The incline is intense and at some points you might just think this is more on the difficult side instead of moderate. The views at the top are worth it though!
Once you get to the saddle, you’ll see the spectacular views worthy of the hike. Many hikers stop here because it’s the end of the maintained trail.
The last 0.2 miles is a rock climb on unsteady rock, so some hikers will skip that part based on comfort and skill level. It’s certainly doable, but if you’re not feeling super confident, there’s no harm in turning back. Needless to say, hiking poles will come in handy for this trail.
Pro tip: because of the busy trailhead location, get to the trail early. If you’re planning a hike and the parking lot is full, circle back and try again later.
20. Sourdough Ridge to Frozen Lake Trail
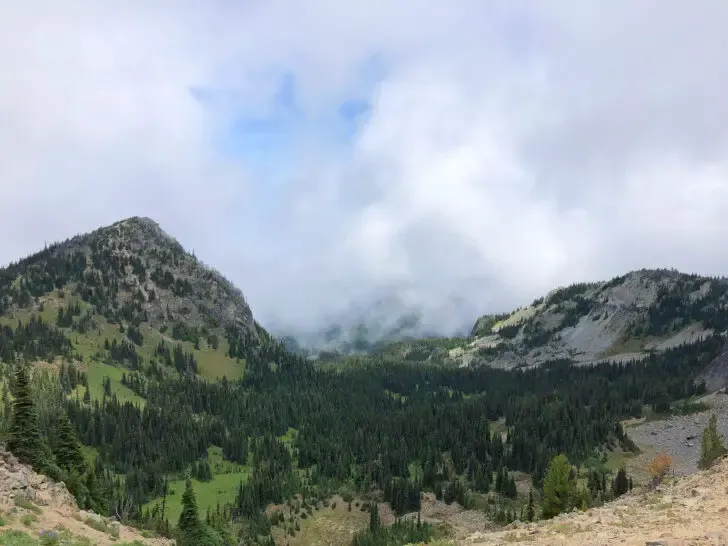
Distance: 2.9 miles
Elevation gain: 557 feet
Hike time: 1.5 – 2 hours
Difficulty rating: easy
Hiking area: Sunrise
Trailhead location: at Sunrise Visitor Center
This easy hike puts you really close to Mt Rainier, which is the highlight of the hike. Views of the Cascade Range are incredible, as the hike is along a ridge.
The trail name is a little misleading – Frozen Lake is not more than a retention pond. But the trail is beautiful because of the sweeping mountain views in any direction. (I happened to go on a foggy day, in which the views were slightly less impressive 😆).
This area is known for seeing an abundance of wildlife, namely, mountain goats! Be sure to keep a respectful distance, as with any wildlife in the park.
If you’re up for a longer hike, this trail intersects with others, making it a more robust option. That’s what makes it one of the most unique Mount Rainier Hiking trails. Gotta love options!
You can add the first and second Burroughs, which will take you closer to the mountain. Also consider connecting with Shadow Lake Trail, which provides more wildflowers since it’s not along the top of a ridge.
Pro tip: be sure to pack layers and sunscreen year round for this one – it’s completely exposed to the elements.
Best hike in Mt Rainier, continued
Okay, if you’ve made it this far, kudos to you. You’ve already got a ton of ideas on where you’ll hike in this amazing park.
The next two hikes are for the most experienced of hikers.They both require extra skill and equipment to be successful.
Let’s keep going.
21. Camp Muir via Skyline Trail
Distance: 9 miles
Elevation gain: 4,680 feet
Hike time: 7-9 hours (unless camping)
Difficulty rating: difficult
Hiking area: Paradise
Trailhead location: Jackson Visitor Center in Paradise
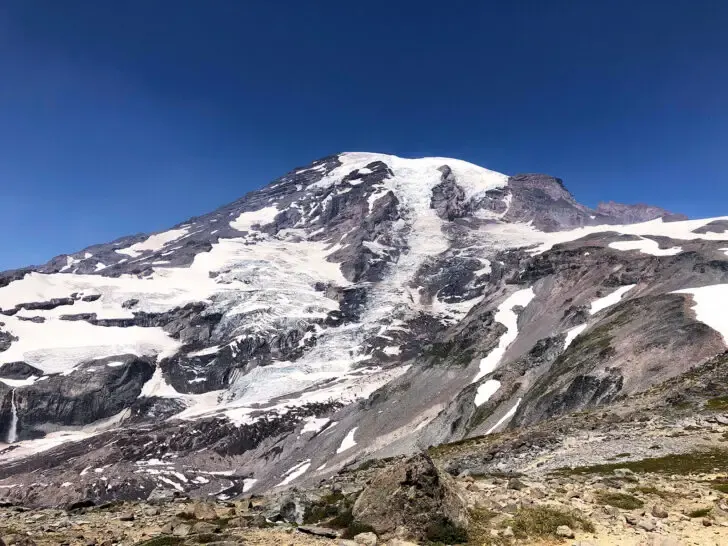
This trail is not for the faint of heart. In fact, it’s really for experienced hikers only. Camp Muir is the highest point you can climb in Mount Rainier National Park.
To get to Camp Muir, you hike the popular Skyline Trail to the highest point, then continue to climb upward. So the first part of the trail is typically pretty crowded with lots of people sharing the trail, then it thins out after passing Skyline.
Covered in snow year-round, the terrain is extremely difficult to traverse.
Crampons, micro spikes, ice axe and hiking poles are some of the equipment you’ll want to hike to Camp Muir. If hiking this trail, you’ll likely pass many crevasses in the top section, which are deep (15-20′) cracks in the ice. Navigate around them carefully!
Some hikers do this as a day trip, taking 7-9 hours on average. You can also camp overnight in Camp Muir (big surprise, right? 😆). Here’s the info on obtaining a wilderness permit for Mt Rainier.
I haven’t personally done the trail, but have heard the hardest part is the descent. Glissading on the snow is an option almost any time of year, which can be a fun challenge!
Pro tip: come prepared for this one! Proper gear, nutrition and planning are key. And don’t mess around with it on a poor weather day, it’s simply not worth the risk. Here’s the official guide from the NPS.
Still, it’s included on this list because it’s truly one of the best Mt Rainier hikes based on how close you are to the top of the mountain.
22. Wonderland Trail
Distance: 93 miles
Elevation gain: more than 46,000 feet of gain and loss
Hike time: 5-10 days
Difficulty rating: extremely difficult
Hiking area: throughout the entire park
Trailhead location: common to start at Longmire, although multiple options
If you spend even a day in Mt Rainier National Park, you’ll see signs for the Wonderland Trail all over. Why? Because it’s a massive trail that leads around the whole mountain!
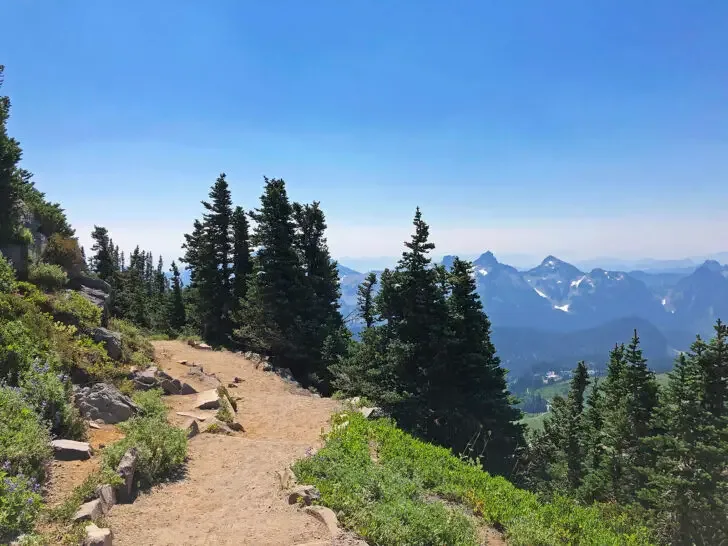
Hiking the Wonderland Trail, you’ll get to see all the beautiful sides of Mt Rainier from the tallest peaks, gorgeous meadows, through wooded forests and high alpine areas. The trail is for serious, experienced hikers only.
The entire 93 mile journey takes about 5-10 days, and requires a lot of training beforehand. If you want to read highlights from serious hikers who have done it, check out this thread. (I personally haven’t done it!) Some of the comments elude to it being an absolutely incredible hike though.
To hike the Wonderland Trail, you’ll need a backcountry permit. With 18 campsites and 3 food caching locations, it takes a lot of planning and training to hike this beauty. But the payoff just may be worth it!
With a trail this massive, you might even be wondering why it’s on this list. Well, it is a compilation of the best hikes in Mt Rainier, but also, because it’s easy to hop on and off the trail to see just parts of it!
Best hikes in Mt Rainier
Well, that’s a wrap! Mount Rainier National Park is an amazing park, and a hiker’s paradise! So whether you’re planning a day hike or exploring the park for a whole week, there’s plenty of Mt Rainier hikes for anyone and any skill level.
Let’s take a look at where to go hiking again, but in a quick list this time…
Best Mount Rainier hikes
- Alta Vista
- Bench and Snow Lake
- Golden Gate
- Skyline Loop
- Tolmie Peak Lookout
- Mount Fremont Lookout
- Palisades Lakes
- Grove of the Patriarchs
- Silver Forest
- Sunrise Nature Trail
- Box Canyon
- Tipsoo Lake
- Trail of the Shadows
- Comet Falls
- Narada Falls
- Silver Falls Loop
- Myrtle Falls
- Naches Peak Loop
- Pinnacle Peak
- Sourdough Ridge to Frozen Lake
- Camp Muir via Skyline
- Wonderland Trail
Related content to read next:
22 Incredibly Fun Things to Do in Mt Rainier You Can’t Miss
AMAZING Skyline Trail Mt Rainier: Ultimate Guide to this Epic Hike
Bench and Snow Lake Trail: Underrated Mt Rainier Hike You Can’t Miss
Paradise Mt Rainier: What to See, Do and Bring Plus Best Hikes
Find this post helpful? Save it for later or share it on social media!

Linnea
Tuesday 25th of July 2023
I had no idea there were so many great options! The views from Naches Peak Loop Trail are fantastic! Saving this for a future trip!
Nikki
Wednesday 26th of July 2023
Yay Linnea! Yeah, it's a beautiful park. The best views are from the hiking trails, too!
Maryanne
Sunday 16th of July 2023
These certainly do look like cool trails. I have never been to Mt Rainier but it looks like a place I should visit. Beautiful!
Nikki
Sunday 16th of July 2023
Oh Maryanne you'd love it then! So many great options for all fitness levels, too!
Jen @ LocalLoveandWanderlust
Saturday 15th of July 2023
I love the PNW, we visited Olympic and I can't wait to come back and see Rainier! Saving for later.
Nikki
Sunday 16th of July 2023
Oh nice, Jen! At this point I've visited Mt Rainier but not Olympic. We need to swap our destinations!
Laureen Lund
Saturday 15th of July 2023
great guide! My favorite mountain in the world!
Nikki
Sunday 16th of July 2023
Oh yayyy Laureen! So glad to hear it. Mt Rainier is pretty fabulous!
Terri
Saturday 15th of July 2023
Sunrise seems more private with less tourists plus you have the amazing views of Mount Rainer. What a place to hike!
Nikki
Sunday 16th of July 2023
You're so right, Terri! Headlamp required :)